Are you tired of manually adjusting your home’s temperature throughout the day? A programmable thermostat could be the solution you’ve been searching for. In this step-by-step guide, we will walk you through the process of connecting a programmable thermostat to your boiler, giving you greater control over your home’s heating system.
By connecting a programmable thermostat to your boiler, you can easily set temperature schedules to ensure your home is cozy when needed and energy-efficient when not in use. With just a few simple tips, you’ll be on your way to enjoying a comfortable and cost-effective heating system.
Understanding the benefits of a programmable thermostat
Connecting a programmable thermostat to your boiler offers numerous advantages that can significantly enhance your home’s heating efficiency. Here are some key benefits:
- Precise temperature control Unlike traditional thermostats that require manual adjustments, a programmable thermostat allows you to set specific temperature schedules based on your daily routine. This means your home can be warm and inviting when you wake up or return from work, while also reducing energy consumption during periods when you’re away.
- Energy savings By automatically adjusting the temperature according to your preset schedules, they minimize unnecessary heating. This not only lowers your utility bills but also reduces wear and tear on your boiler, which can extend its lifespan. The energy efficiency provided by a programmable thermostat contributes to a smaller carbon footprint, making your home more environmentally friendly.
- Extended equipment lifespan Frequent cycling (turning on/off) strains HVAC components, leading to premature wear. Programmable thermostats reduce this strain by maintaining steady operation cycles. For example, gradually adjusting temperatures prevents sudden system surges during peak demand. This efficiency prolongs equipment lifespan, delaying costly replacements and repairs.
How to connect a programmable thermostat to the boiler in 5 easy steps?

Connecting a programmable thermostat to your boiler is a relatively straightforward process. However, it requires careful attention to detail and some basic tools. Below is a step-by-step guide to help you get the job done right.
Step 1: Shutting off the power to the boiler
The first step in connecting a programmable thermostat to your boiler is to ensure your safety by shutting off the power to the boiler. This is a crucial precaution that should never be overlooked, as working with electrical components can pose serious hazards. Locate the power switch for your boiler, which is usually found near the unit itself or in your home’s electrical panel. Flip the switch to the “off” position, and if you’re uncertain, it’s prudent to turn off the circuit breaker that supplies power to the boiler.
After turning off the power, it’s a good practice to use a voltage tester to double-check that the power is indeed off. This device will indicate whether there is any electrical current flowing through the system. Ensure that the tester is functioning correctly and follow the manufacturer’s instructions for usage. By confirming that the power is off, you can proceed with confidence, knowing that you’re working in a safe environment.
Step 2: Removing the old thermostat
With the power securely off, you can now proceed to remove the old thermostat from the wall. Start by carefully unscrewing the thermostat cover, which typically involves removing a couple of screws. Once the cover is off, you will see the wiring connected to the thermostat. Take a moment to note how these wires are connected. It can be helpful to take a picture or label each wire for future reference, as this will guide you in wiring the new programmable thermostat correctly.
After documenting the wire connections, gently disconnect the wires from the terminals. Depending on the model, you may need to loosen screws or pull connectors to detach the wires. Be cautious during this process to avoid damaging the wires themselves, as they are crucial for the functionality of your new thermostat. Once all wires are disconnected, carefully remove the old thermostat from the wall, taking note of any mounting hardware that may need to be reused or replaced.
Step 3: Installing the new programmable thermostat
Now that your old thermostat has been successfully removed, it’s time to install the new programmable thermostat. Begin by following the instructions provided in the user manual to mount the new unit onto the wall.
Most units will come with a mounting plate that needs to be attached first. Use a level to ensure that the plate is straight before securing it with screws. This step is critical, as an uneven thermostat can lead to incorrect temperature readings and inefficient heating control.
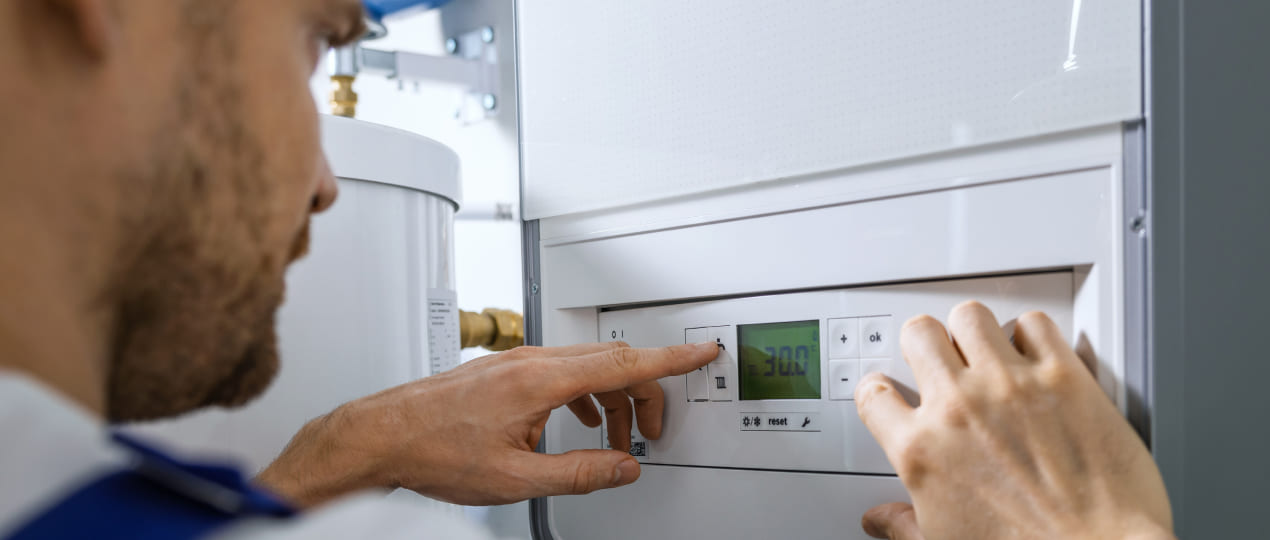
Step 4: Wiring the thermostat to the boiler
Now that your new thermostat is mounted, the next step involves wiring it to the boiler, which is essential for the system to operate correctly. Begin by locating the terminal block on your boiler; this is where the thermostat wires will connect to the heating system. Similar to the earlier steps, refer to the user manual for your boiler to identify the correct terminals for the thermostat connection.
Carefully take the wires you had previously connected to the old thermostat and connect them to the corresponding terminals on the boiler. Ensure that you match the wires correctly according to their designated functions. This is where the notes or pictures you took earlier will come in handy.
Once all connections are made, double-check that everything is secure and properly fastened. Loose connections can lead to intermittent heating issues, which can be frustrating and costly. After confirming that all wires are connected and secure, you can replace any access covers on the boiler to ensure safety.
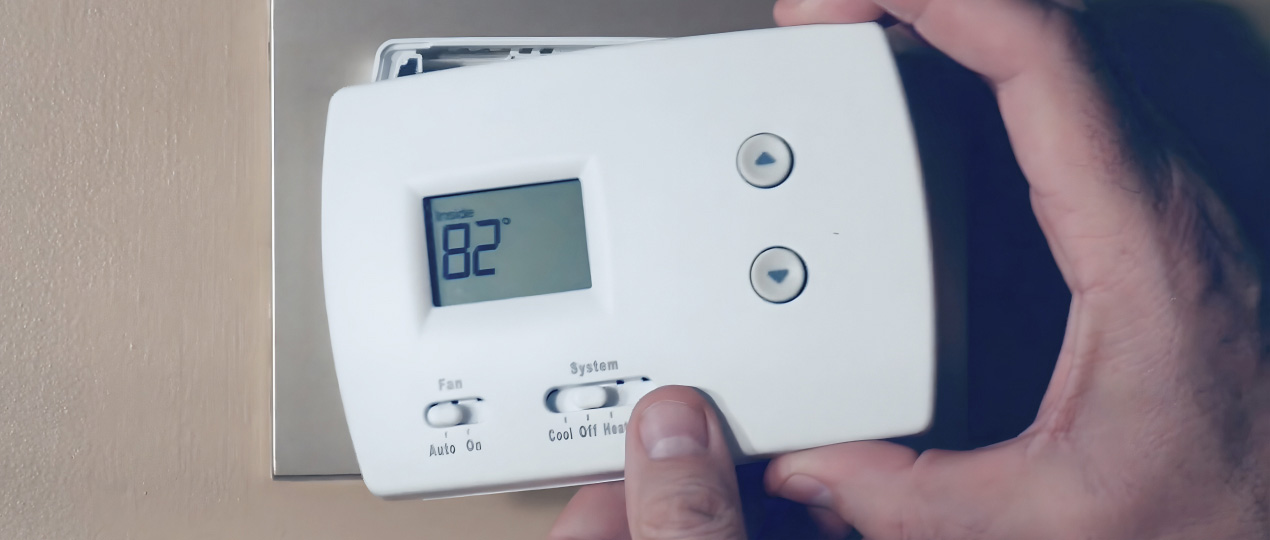
Step 5: Testing the thermostat and boiler connection
After you have finished wiring the thermostat to the boiler, it’s time to conduct a thorough test to ensure that everything is working correctly. Start by turning the power back on to the boiler, either by flipping the switch or resetting the circuit breaker that you turned off earlier. Once the power is restored, observe the thermostat display to confirm that it is powered on and functioning.
Next, set the thermostat to a higher temperature than the current room temperature. This should trigger the boiler to start heating the water. Listen for the sound of the boiler igniting or starting up, and feel for warm air coming from the heating vents. If the boiler responds as expected, this indicates that the connection between the thermostat and the boiler is functioning correctly.
If the boiler does not respond, double-check all wiring connections to ensure they are secure and correctly placed. Once you’ve confirmed that the system is operational, take a moment to run the heating for a short period to ensure that it maintains the set temperature. This final test will verify that your new programmable thermostat is effectively controlling the boiler, paving the way for optimal comfort in your home.
Programming your new thermostat for optimal energy efficiency
Now that you have successfully installed and tested your new programmable thermostat, it’s time to program it for optimal energy efficiency. This step is crucial, as a well-programmed thermostat can significantly reduce your energy bills while maintaining a comfortable living environment. Begin by consulting the user manual of your thermostat, as it will provide specific instructions on how to set up the schedule and adjust the settings.
To maximize energy efficiency, consider programming the thermostat based on your daily routine. For instance, set lower temperatures during the hours when you are away at work or asleep, and program the thermostat to warm up the house shortly before you return home or wake up. Most programmable thermostats allow for multiple settings throughout the day, so take advantage of this feature to create a customized schedule that meets your lifestyle.
Additionally, many modern thermostats come with features that enable remote programming and adjustments via smartphone apps. This means you can make changes to your schedule on the fly, ensuring that you never waste energy heating an empty home. Don’t forget to periodically review and adjust your settings as your routine changes or as seasons shift. Regularly optimizing your thermostat’s programming will help you achieve the best balance between comfort and energy savings throughout the year.
We’ll provide a comprehensive service that quickly and professionally solves your HVAC problems.
Order the best specialist in Canada Now (866) 545-6460
REFERENCES
1. Maheshwari, G. P., Al-Taqi, H., Al-Murad, R. A., & Suri, R. K. (2001). Programmable thermostat for energy saving. Energy and buildings, 33(7), 667-672. https://www.sciencedirect.com/science/article/abs/pii/S0378778800001328
2. Tamas, R., O’Brien, W., & Quintero, M. S. (2021). Residential thermostat usability: Comparing manual, programmable, and smart devices. Building and Environment, 203, 108104. https://www.sciencedirect.com/science/article/abs/pii/S0360132321005059